Monday, May 28, 2012

Makeup Brush Essentials: Eyes & Lips

This is a post that is hopefully helpful to the beginners out there who cannot decide what type of brushes they should be looking for. Don't get me wrong, my brush collection has taken a loong time to slowly build up, but as long as you start with the basics you can keep adding to it later on. You also don't need to buy the most expensive brushes for a great result.
However today I will not be focusing on the brands, simply on the type of brushes. I hope that makes sense lol.


 Lid brushes
*Apologies for the brushes not being in the same order, D'oh!*
Top: Synthetic Flat brush: This is not absolutely essential, but it is good for applying primer & cream eyeshadows to the eyelids. Synthetic is best for creams as it will not soak up all the product, making it easier to clean.
Middle: Large Stiff Shader brush: This is good for packing a whole lotta colour onto the lid.
Bottom: Small Shader Brush: Simply used for the same method as the larger one, however it is better for precise application of different colours to the lid.
Stiff shader brushes are also good for using the very tip to apply eyeshadow to the lower lash line.

 Eyeliner
Eyeliner brushes come in different shapes depending on the look you want to achieve.
Angled liner brushes: In this picture these are the same type of eyeliner brushes, however I use the top one for eyeliner and the bottom one for my eyebrows. That way I don't have to worry about cleaning them all the time & getting black on my eyebrows, lol. You can use this with Gel Eyeliner but I prefer to use it to pack on eyeshadow on top of my eyeliner for longevity.

The top 2 are thin brushes great for Gel & liquid eyeliner. You can see the only difference to the bottom ones are that the handles are shaped normally.
The bottom 2 are Bent Eyeliner brushes. I simply have 2 for light & dark colours. These are great because you can easily do your eyeliner without worrying about the handle getting in the way. Please note you do not need to own all of these. Whatever your preference is fine. Once again these are good for cream & gel eyeliner. You can even dip it into your liquid eyeliner if you wish.

 Crease Brushes
These are a few different types of brushes which are good for applying colour to the crease & outer v.
Top: Fluffy crease brush: This is good for applying & blending colours to the crease.
2nd: Pencil Brush: Good for precise application to the crease & outer v. Also good for the lower lash line if you have larger eyes or for smudging out eyeliner.
3rd: Pointed crease: (I had washed this the night before so its a bit out of shape). Really good for precise crease work e.g. for cut creases
Bottom: Pointed crease & Outer v: (again lol) Same concept as the one above, but especially good for the outer v because of the size.

Blending
Top & 2nd: Stiff dome blending brushes: TMakeup Geekhese are really versatile for applying a wash of colour over the lid & crease, blending colours on the lid & crease while depositing colours.. I recently purchased a second one because it doesn't take long for them to get dirty lol.
3rd: Soft Dome : This one is slightly pointed however because it's not stiff it's great for blending colours together on the lid or blending out in the crease. You can live without it if you have a stiff blending brush.
4th & 5th: These are just a couple of other different brush shapes good for blending. Once again they are not needed,but I think the more the better, especially if you are doing a look where you need a clean brush to blend out & one with colour to add more colour on at the same time. Hope that makes sense ;)

Other Eye Brushes
Top: Brow & Lash brush: Just any run of the mill brush like this should do, good for combing through your brows & lashes to get rid of clumps.
2nd & 3rd: Highlighting Brushes: These are good for highlighting on the brow bone & tear duct. The 2nd brush is good for blending it out as it's applied & the 3rd, because of the angle & being stiff, is good for precision.

Lips
The top brush is good for applying your lip colour all over, the bottom is good for precise application right around the lip line. If you use a pencil lip liner first you don't exactly need the 2nd brush.

I hope this is helpful & not confusing. All in all you do not have to have everyone of these brushes especially if your starting out, you can use certain brushes for different things. You also don't need to spend the big bucks for great brushes. I'll post some websites for great affordable brushes (all are non affiliated).

Makeup Geek As far as I know these are crown brushes that have been repackaged (Please correct me if I'm wrong) but they are so affordable & offer worldwide shipping.

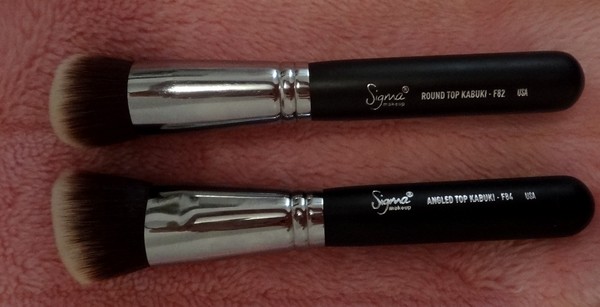
Sigma They offer a great selection on many different types of brushes, duping the famous MAC 217 brush (Sigma E25, one I bought not too long ago)

Eco Tools The 6 piece brush set is great for starting out (I love the eyeliner brush)

Tip: DO NOT buy MAC brushes (or really MAC anything) on eBay. Most of the stuff on there is fake. You cannot buy a whole set for the price of one brush, haha. Just a warning!


Friday, May 25, 2012

Anniversary EOTN, Smoky with Makeup Geek

The other night was my SO & my 1 year anniversary of engagement, I can't believe how fast the year has gone! We often get the question "when's the date?" & fortunately we haven't really had "Why did you get engaged if you weren't planning to marry straight away?" so you can guess we don't have a date & that's how we want it for a while, lol. I'd rather have completed my traineeship before having to worry about planning something so big.
~Anyway~
We just went out for tea, nothing too fancy because that's the way we wanted it lol. But I still wanted to do my makeup nicely. It's certainly no first-date makeup & probably a bit too much for some people but it was just like any other occasion to go out for dinner.
I used a few Makeup Geek (MUG) eyeshadows -reviews and swatches coming up soon!). Here it is.


I managed to get one decent-ish face photo because I took these at night and I don't really have good lighting around.

1.  Mercury 2. Galaxy (also lower lashline) 3. Stealth 4. Sensuous (lower lashline as well. 5. UD Bootycall 6. Vanilla Bean
BYS gel eyeliner. Bourjois Curling mascara (Can't think of the whole name sorry!)

For the cheeks I used Nyx's cheek tint in Tulip & lips I think was just a nude lipstick with a coral gloss over the top. If you want more details let me know but I didn't want to focus on the lips! Especially as I knew it would just come off straight away haha.


Like I mentioned I will have some Makeup Geek eyeshadow swatches coming up in a couple of weeks (if not before- that is forever to wait I know) so keep coming back to look.

Thank you for looking!

Thursday, May 24, 2012

How to get bouncy curls overnight!

There are many ways to get curls with no heat, but this is such a pretty way that you can wear out before taking it out- I left mine in for 24 hours before I did (believe me the elastic headband kept slipping down & driving me crazy, but if the hair was coming out all it took was to kind of roll the hair back under the band).

 All I used was an elastic head band and twisted my hair starting from the front & working side to side until all hair is tucked under it. Its hard to visualize like that but there are a few great tutorials on youtube.
 I couldn't find the one from lilithedarkmoon   but this is what I did

I used a thinner one for my hair so the curls turned out a bit different to hers but it's pretty much the same result. You can also add mousse to your hair before twisting it.
Sorry for the instagram photo lol- but this is how it looks from behind. Super Pretty!


 Its hard to see but this is how it looked up from the side. Although it was the morning after I slept with it in so it as quite messy!

--Take out the band & play with your hair so it sits right--
I have done it again since the first time- and this time I had even better curls but didn't leave it in as long- as long as your hair has dried it's fine to take it out. I didn't want to brush it out either because I knew it would drop. This time the pieces from the front had curled right back- you can sort of see it in the layers near the fringe.

What are your favourite ways to curl your hair without using heat? Let me know! And who are your fave Youtube Gurus for hair?

Monday, May 21, 2012

Blog Hopping: The New Trend

Haha, instead of bar hopping, get it? :P
Bad jokes aside, blog hopping is a great way of getting your blog noticed, and checking out a lot of other bloggers.
So when I saw this website I thought It would be perfect. They offer a weekly hop where you follow the simple instructions to get your blog put out there, and to check out other blogs. You can even start your own hop.
They also offer a blog critiquing service where they will post your blog so you can get feedback from all sorts of readers which I think is a great idea.
In fact, my blog was recently featured for critiquing. Woohoo!!
Check that out here ! & Feel free to contribute. I'm definitely going to work on tidying up my blog.
They also include lots of blog tips which are great for beginner bloggers.
Click the pic below to check out the site.


Sigma face Brushes: F82 + F84

I've been window shopping on the Sigma website for the longest time, making wishlists but not actually purchasing. I finally bit the bullet and ordered a couple of face & eyebrushes.
Today I'm reviewing the Sigma f82 and f84 brushes. I purchased them a few weeks ago as a pack together as they had a special of $8 off and because I have been looking for something like these for a while.


Description from the Sigma Website.
"The Synthetic Sigmax Duo contains two of our best-selling brushes with classic black matte handles. The brushes in this collection feature the exclusive Sigmax filament, which allows for flawless makeup application without absorption into the fibers. The F82 is soft, dense and round for seamless blending of mineral products onto the skin. The F84 is soft, dense and angled for easy buffing of blush or bronzer onto the skin."

From what I've seen, the Sigma f82 is a smaller, rounded version of the f80 brush. I think you can use it for foundation but as it is so small that may take a while, however I think its perfect for blending in concealer and for the size it works well for the eye area.
Again from the website:
Unique Feature: Dense and rounded head 
Function: Buffed powder foundation application 
Recommended Use: Blend mineral products onto the skin. 
Bristle Type: Synthetic Sigmax

Although it says to use it for powder foundation it works fine with liquids & creams.
As you can see it blended very nicely into the skin. I used the brush in a stippling motion on top of the concealer but also dragged it slightly as I stippled.

I've tried using the f84 brush for powder blush application, but because the bristles are so stiff & dense it's hard to blend the blush in, however it is great for applying cream blush & for contouring. I have needed a brush for the cream purpose for so long so I'm glad I've finally gone ahead and bought one, lol.

Unique Feature: Soft and angled head
Function: Blended cream product application 
Recommended Use: Buff cream blush or bronzer onto the skin. 
Bristle Type: Synthetic Sigmax

I applied a wee bit too much on the brush but I'm going to demonstrate using the Nyx cream blush in Hot Pink.

You can see that I applied a fair amount in the first pic but in the second I blended over the top with my E.L.F Flat top brush. It really did apply the brush nicely but because it picks up so much colour (especially if its as bright as this one!) you have to have a light hand.

 All in all I'm really glad I bought these brushes and I'm really happy with them. I hope this review is helpful. (let me know in the comment box!) I've also washed them once and there seems to be no shedding.

Oh & these brushes are still on sale so if you like what you've seen & heard then I recommend them.
http://www.sigmabeauty.com/Synthetic_Duo_p/smax05.htm
(Not Affiliated- These were purchased with my own money, all thoughts & opinions are true)

Wednesday, May 16, 2012

Makeup on Others

I'll jump at a chance to do makeup on others, especially as I need to practice because its so different from doing it on yourself! Haha.


 This is my friend Shenitta, we went to primary school and can you believe it but 2 weeks before this was the first time we had seen each other in 11 years. She moved away but now she's back doing a Beauty course so I was able to travel up and see her :) And she wanted me to do her makeup and we didn't think we'd have a chance but she got to come around to where we were staying before going out :) So yeah haha.

If you can think back to my dramatic goldilux look a few posts ago I did
pretty much the same thing here but I like how it looked on her, and I reallly wanted to use gold with her blue eyes!
~Products~
Sugarpill Goldilux
Black from Too Faced Ooh & Ahh duo + UD Blackout
The white shimmer you can see in the inner half is mainly from the shadow she was already wearing but I'm pretty sure I also used UD Bootycall as a highlight,
& I think I may have used a bit of Tease in the crease & BYS eyeliner.


This was on my friend Renae who came back to her home town for a holiday, we have known each other our whole lives :) She wanted me to show her how to do a smokey eye. It looks like we used falsies but they are eyelash extensions, which is funny 'coz I thought she got pro at applying falsies haha :D I didn't take any full faced pics though =/

As a base I used Essence Ballerina Backstage eye souffle in Black followed with silvers & blacks from her BYS palette, UD Tease as a transition colour, BYS gel eyeliner on the top lashline & waterline & I know I used something for the highlight but I can't remember what XD haha.


On the weekend was the school ball so I was busy at work all afternoon. I thought it would be a lot more stressful but once we got started it was all good and I got so into it that the afternoon went by soo fast lol. I only got permission by one girl to post her pics but I figured it would be ok to crop around the eyes.

 Teegan wanted natural eyes but I knew they had to stand out so I used colours from the naked 2 palette: YDK, Tease & busted were the main colours.
 Sorry for the blurry picture unfortunately we didn't get one of her eyes shut but she wanted a pop of blue to match her blue accessories so that is on the lower lash line. I focused on a shimmery white on the inner half & also used from Naked 1 Smog & Darkhorse.
 I did a trial for her a few weeks ago but her dress changed and so did the makeup. I like this one so much better though, although the trial turned out nicely too. I used a mixture of purples from a Chi Chi palette & 120 palette, although you cant see it very well I put some silver glitter over the top & layered it with more purple & the black is mainly UD Blackout over a black base. I wish I had time to tidy up the eyebrows a bit, though. I also applied false lashes (if you couldn't tell ha). I practised on friends all week (well twice lol) but it went on easily for her, wahoo!
Before you say anything, after these pics I added some silvers into where the blue is as it goes into the inner corner to fix the shape after I took these pics. I used the Sleek Bad Girl palette (More to come on this as I just got it) as she wanted it smokey with some blue to match her dress.

So now that the ball is after I just want to play with makeup on other people haha! I had a fun time doing it lol.
Thank you for looking xxx

Sunday, May 13, 2012

Cherry Culture small haul + Milani FOTD


I've wanted to order from cherry culture for soo long but have finally gotten around to doing it, yahoo :)
Mainly because I had seen 2 blushes from Milani that looked soo good on others. Plus I have wanted to try their lipsticks for ages.


L-R: Nyx Stick blush in Tulip. Milani Baked blush in Luminoso & Fantastico Mauve
 Yeah so. 2 seconds after I opened Luminoso, I dropped it!! waaaaahhh. ^%^#$@ hahah. Luckily it hasn't crumbled completely but when it does I will put it into a jar and have to deal with loose blush. Its such a gorgeous colour too!!
 Milani Color lipsticks in Rosehip & Berry Rich
Thought I'd give these a whirl for $1.50 each haha. L.A colours in Peek-a-blue & Melon Sorbet.


SO heres a look featuring a few of these products....


 Products~
 L.A colours Melon Sorbet
Orange pigment from Madd Minerals (in the crease)
28 Neutral Palette
Maybelline Master Precise e/l

Nyx natural cream blush
Milani Luminoso

Nyx Pinky l/l
Milani Rosehip l/s

Sorry for those mascara dots!
In the last pic I changed the contrast a tiny bit and this is closer to what it looks like IRL.
Have you tried any Milani products and what are your faves?

xx

Wednesday, May 9, 2012

How to: Summery Electrick Eyeliner

Yes, yet another eyeliner look lol. This is a fun look for summer & can be done with any colours.
I practiced it the night before, just randomly when I was bored haha & decided to wear it out the next day.

I had done my eyebrows earlier but apart from that only one side of the face has makeup on it so I could see the difference. Its not the best pic though under my eyes def. look better with concealer!

Take 2~


How To:
Put a wash of colour on the lid & in the crease using neutral colours. I used Urban Decay's Naked on the lid & Tease in the crease.

Using a small eyeliner brush (Sonia Kashuk Bent eyeliner) , take a white cream - Nyx JEP in Milk & draw your eyeliner on the top & bottom lashine. I added extra in the waterline.

Taking your colours one at a time apply them starting from the inner corner of the top lashline, & as you apply the next colour, bring it slightly into the first just to help them transition nicely. Do the same on the lower lashline using different hues if you like. I used the 120 palette for these colours. Also highlight if you wish.

Apply the thinnest line above your lashes as possible in black (Maybelline Master Precise) & add mascara & you're done! Also keep your foundation looking dewy & fresh & make sure your eyebrows are groomed.

I am pretty sure that I used Nyx's Peach blush & bronzer to contour. Lips are Nyx strawberry milk but I think a slightly darker lip may help to balance the eyes & lips a bit better.
Thanks for looking & I hope you enjoyed this post!