Wednesday, November 10, 2010

Make your own face mask/ exfoliator: The Aspirin Mask


I've been using the aspirin mask a fair few times now, as i heard that it is great for acne, scarring & it has also helped with providing extra moisture for my dry skin. It also has natural ingredients so you know what your putting onto your skin. The mask shouldn't be used no more then 2x a week because in time your body may become immune to the aspirin & it will not be as effective. 

After i have used it my skin feels much more softer & i have noticed it has helped with my blemishes. In addition to using honey with the aspirin, i also added a tiny bit of glycerin lately & my skin felt even more moisturized. You can also add a drop of lemon juice as it is good with pigmentation/ scars, but don't add it if you have very dry skin. Ok so on to the recipe ...

 What you will need:
~2- 3 Aspirin (uncoated or it will not dissolve as easily)
~About 2 teaspoons pure/ organic honey or natural yogurt.
~Water, a bowl/shallow dish, teaspoon

What you do:
~Dissolve your aspirin in the bowl using a few drops of water, no more as you don't want it to be too runny.
~Add honey / yogurt to make a paste.
~Wet your face & apply all over, avoiding the eye area. Relax for about 15-20 minutes.
~Wash with warm water & a damp towel to exfoliate your skin at the same time
~Moisturize thoroughly.

How it works:
~Aspirin is a anti-inflammatory, & it contains salicylic acid, which is a widely used in anti-acne products. It is good for exfoliation as salicylic acid is a form of beta-hydroxy-acid (BHA) which allows skin cells to remove easily & promote new cell growth. It is also good for hyper pigmentation, skin texture, evenness of skin tone, acne and blemishes.

~Honey & yogurt are natural antibacterials, which is great for acne & scars. Honey is also hydrating which is perfect for dry skin.


x ashii

~Some information taken from http://threesugarsplease.blogspot.com/2009/06/review-aspirin-honey-mask.html
& http://munichexpat.wordpress.com/2009/12/09/winter-skincare-honey-and-aspirin-face-mask/

Wednesday, November 3, 2010

Smoky Look using 88 warm palette

I did this quite a few weeks ago now, never really bothered to post it though lol but we were going out for dinner & i wanted something smokier especially since it had started raining that day, lol. This was done using the 88 warm palette (which i still need to do a review on) but i can't really remember the colours i used! For lips im pretty sure i used Revlon's nude attitude. thanks for looking :)


Sunday, October 31, 2010

Wearable Rainbow FOTD

Helloo everyone, this is a look i did the other day inspired by makeupgeek tv... hope you like! with some bonus photos.


Eyes~
120 palette- mixed green & blue, baby pink, purple, darker pink in crease with some orange in the inner crease
white shadow from 88 warm palette for highlight

Cheeks~
NYX blush in peachy & taupe
Lips~
Mix of NYX strawberry milk & random pink lipstick together


 and for something different i braided my own headband by taking a section of hair from behind both ears, dividing that into 2 sections & using a ribbon as a third section, then braided them together and pinned up over my head


bonus pics!
i'm house sitting for my aunty & here is her gorgeous Maltese shiht'zu (sp!? lol) Denis


thank you for looking!

Thursday, October 28, 2010

Eyeshadow on the lips, not on the hips.

soo the other sunday i was so bored & i didn't feel like doing my eyes up 'coz then i would feel the need for foundation. & i wasn't actually planning on leaving the house anyway so i thought that since i never really play with lipstick, why not! I wanted to try some things that were different for me, so i used eyeshadow.

Now I've tried to use eyeshadow before but it made my lips feel dry something cruel, so i made sure i put on lip balm beforehand. Another thing i never thought to try was to use a lipstick as a base, just like using a colour base on the eyes to bring out the colours. well it worked perfectly! it made the colours apply soo much more easily & i was very happy with the results.

For these i used the 120 palette but no lip liner so sorry for some of the bleeding.  also with the first one i tried to make my lip shape look a bit different but it didn't show up well in pictures.


top pics are with flash, bottom are natural light

It was too bad that you couldn't see the darker colours on the outside (i wanted a gradient-like effect) but it was weird how with the orange i had red but you cannot see it at all. And over the top of these i applied clear gloss carefully with a lip brush to avoid the colours mixing in together.

Thanks for reading, i think i will definitely be playing with different lip colours this summer!
x ashii

Wednesday, October 27, 2010

Quick Tip # 2: Washing your hair

Washing your hair is something you don't really think about, you just do it, but I have learnt recently that there is a proper way to wash your hair & it does make sense (to me), so I'm going to share with you & if you have anything you'd like to add/correct, leave a comment & I'll add it in!

Shampoo~
The scalp is where most of the dirt and oil is, and because your hair is technically dead you don't need to use shampoo for the shafts. So apply your shampoo evenly over your scalp and scrub,  while letting the shampoo run down to the rest of the hair so it cleans that as well without you needing to rub your hair.


Conditioner~
The ends are the oldest and most damaged area, so take care to apply your conditioner here first while massaging it in.  As you go up higher until you get to the roots you should be adding lesser amounts to none. Unless you have a very dry scalp it should be ok but if it gets oily quickly you should probably avoid using it in that area, but i usually massage in a tiny bit to the scalp from the roots for a minute. Don't rinse it out straight away because you want your hair to absorb it in.


After wards~
For years after every time I've washed my hair i have always rinsed it in cold water. This closes off the cuticles, which creates a healthy, shiny appearance. Also never ever rub your hair dry, take a towel & squeeze/blot all the excess ends out.

thanks for reading, hopefully this was useful, please comment with anything extra!!

x ashii

Tuesday, October 26, 2010

My Hairs Best Friend: Moroccan Oil Review

Rightio, I have been using Moroccan Oil for over a month now & let me start by saying it is amazing!! Now time for introducing my hair (lol) which is very thick & wavy, dark, medium-ish to long length & i would have to say it is in good condition. My hair is also fairly dry on the ends (gets oily on the scalp about 2 days after washing) but that's about it. It needs all the moisture it can get.


I'm not going to lie Moroccan oil is expensive, it is about AU$49.95 for 100ml, but let me just say that a little goes a loong way. Since using it, i have rarely made a dent in it; with that being said I don't use it every day, only when I wash & style my hair which is about 3x a week.
 After using it my hair is noticeably softer, less frizzier, shinier & feels moisturized! I could do with a moisturizing treatment once a week as well because my hair is *that* dry, however i think that this could also be used as a treatment, but i like it as a serum.


Pros:
 -Not too runny, not too thick: pours nicely into the hands & is easy to distribute evenly throughout the hair
 -smells great! nice summery smell
 -doesn't make your scalp feel oily(unless you've used too much or put most of it on your scalp instead of your ends)
- uhh well... it works! hair feels uh-maze-ing!! 
Cons:
-ummm... i don't think there is any!!

How I use it:
Just before I blow dry my hair I pour about the size of a 10c coin into my palm, rub my hands together and distribute it evenly throughout my hair, concentrating on the ends rather then the roots. Sometimes i need more since i have soo much hair.
I then blow dry my hair and after wards I add just a tiny bit more oil & smooth it onto my hair. But theres been some days where i haven't blow dried my hair after using it and my hair hasn't frizzed like it normally does!

Overall.... i can see why Moroccan Oil is quickly becoming a cult product & i will definetly buy again when (and if) i run out. 10/10!

Sunday, October 24, 2010

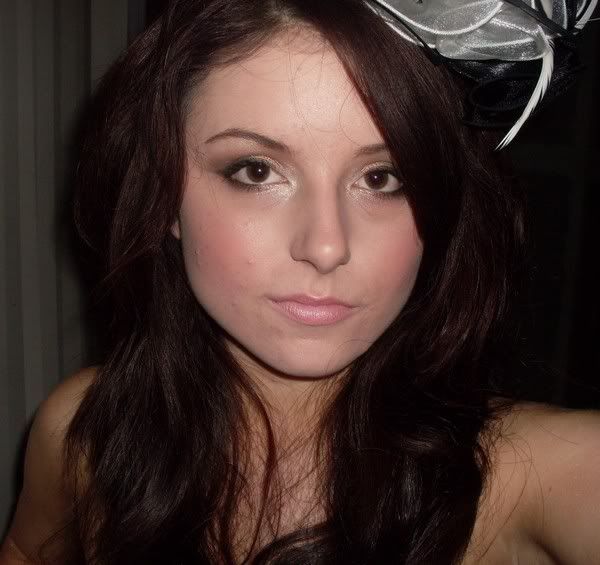
Hens Party- Smokey Gold FOTN

Well my lovely friend had a hens night the weekend before her wedding (which I am a bridesmaid in-yay!) & the theme was masquerade/ fascinators.We had a really good night, played quite a few games before making a wedding dress out of toilet paper for the bride-to-be & going down to the pub lol! 
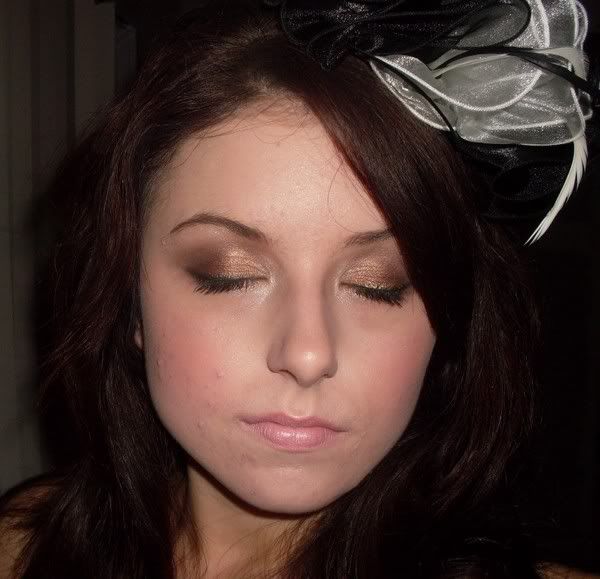
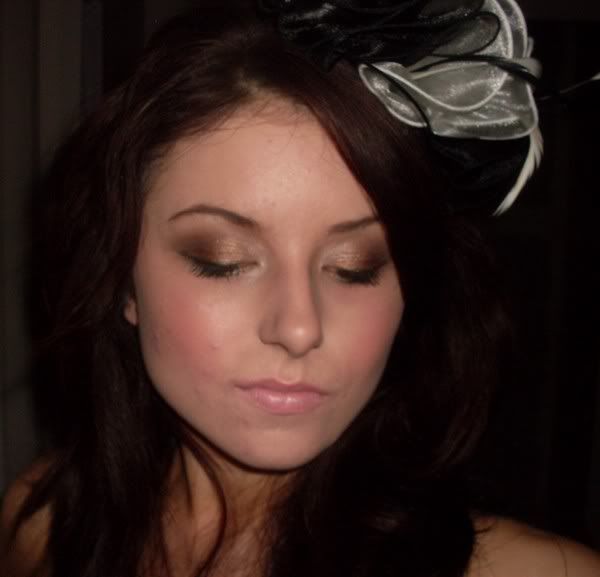
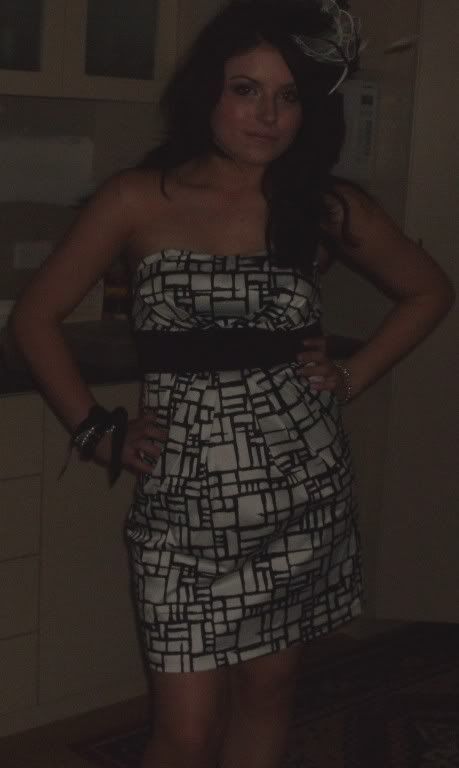
Onto the makeup- I was wearing a smokey gold look during the day but i didn't really need to amp it up for during the night so i pretty much left it as it was with touching up a little bit. Included are some pics of my outfit. thanks for looking!


Face~
Revlon Photoready in Shell (i have gotten a new foundation for summer hopefully it matches better now!!) 
Palladio Rice Powder in Translucent to Set
NYX rouge cream blush in natural
Nars orgasm blush
NYX Taupe

Eyes~
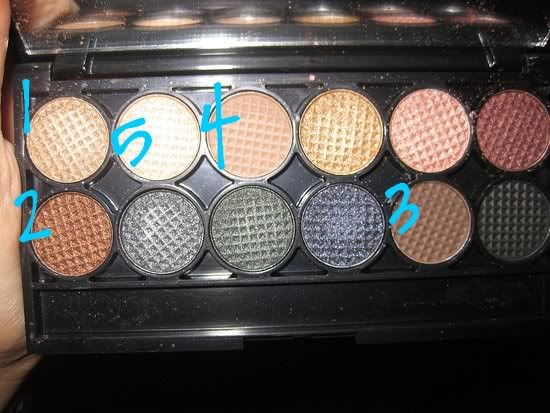
Sleek Palette in Storm (see photo for reference)
1- lid colour, inner of lower lashline
2-outer lid + into crease & lower lashline
3- Outer crease
4-blended into 3
5- highlight+ inner corner
Bourjois contour e/l
Covergirl lashblast mascara
Lips~
BYS lipstick in champagne glow (i think thats the name lol)

for the hair i made waves with my hair straightener (not all over or that would have taken forever & a day! oh and of course clipped my fascinator in.


Outfit Pic Time! Luckily Melbourne Cup is coming up on the first Tuesday of November[??] so when i went shopping in the city there were plenty of fascinators to choose from. Its hard to see but I really liked mine- hopefully i can wear it again!!

sorry for the bad lighting!
Fascinator- $25 from Target
Dress- $50 from Target 
Bracelet- $4.99 from Cotton On Body
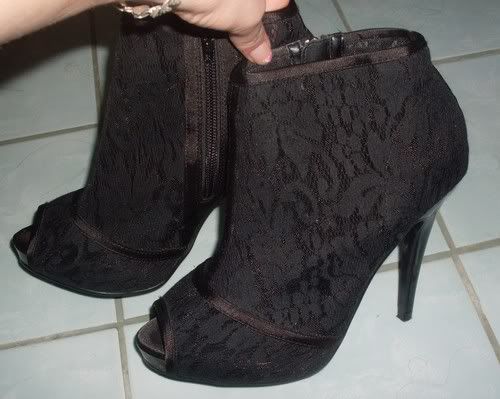
Shoes were also $50 from Target (pic below)


So thanks again for reading and finally everything mentioned was brought with my own money!!
xxo ashii