Monday, April 30, 2012

How to: Liquid Winged eyeliner.

I want to make a couple of different types of eyeliner tutorials, and since I've found a new way of doing my eyeliner I wanted to share this one first. So if you want to learn how I do my winged eyeliner keep on reading!

 The eyeliner that I used is Maybelline Master Precise. I really like it because the brush is very thin & easy to use, and easily buildable if you like your eyeliner a bit thicker. It also lasts alll day. Anyway there's more on that here. Another good one is Revlon Colorstay as it has a felt tip which is really good for beginners.

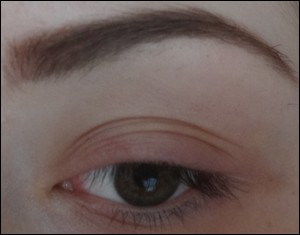
 Start from the middle of the lid using small strokes to the edge of the eye, keeping it as thin & close to the lashline as possible.
 Make a wing as long as you like from the top of the first line. I draw it on outwards.
 And then join another line up from the bottom of the first line, reaching to the tip of the second line, making a little triangle.
 Fill in the middle of the triangle and there is your wing.

Either leave it like that or draw in backwards from the wing onto the lashline, making the eyeliner as thick as you'd like. Taper the line into the lash line as you go inwards.
I decided to go right into the inner corner. If you do this you would want to keep this part of the liner the thinnest.

Voila and your done :D You can see what a big difference eyeliner makes. You can also see that one wing is pointed up a bit more than the other, but that's ok as long as it's not too noticeable. Your eyes are sisters not twins :P
Add eyeliner to the lower lashline if desired.

Lastly I tightlined (filled in the top waterline with gel eyeliner to get rid of the skin that you could still see- not as noticeable with mascara on) & added mascara to complete the look.
Remember you can play around, making the eyeliner as thick or thin, the wing as long or small as you like.

I hope this is useful to somebody, please let me know if this method works for you!!
xxx

Friday, April 27, 2012

New Hair, Sultry Naked 1 eyes.

I needed a change for my hair, although I loved the last colour it was time for something a bit different, so I got some balayage!
The hairdesser at the salon I work at wanted to try it for the first time and she did a good job. Otherwise, the base colour is not too different there's just a bit of pink in it too :)


The way it looks in the sun :)


 When we get a chance we are going to put a couple more foils in the front sections just to listen up a tiny bit more.. she didn't want to add too much just in case!
And for the makeup..
well I did have something else in mind but mine turned out nothing like the pic so I wont bother showing it lol, I'll try it again some other time. But I still like how this turned out

 Products
NYX JEP in Yoghurt
UD Naked 1:Toasted (Lid) Hustle (crease)
UD Naked 2: Snakebite (crease above Hustle) Bootycall (Highlight).
Maybelline Master Precise Eyeliner
BYS Gel eyeliner

Cheeks: Bourjois blush in 34
All About Glo Bronzer

Lips:
Nyx l/l Rose
Nyx l/s Harmonica
" " l/g Sugarpie
" " White Pearl (center of lips)

I wish toasted would come out as the colour it looks in the pan! It looks quite goldy here to me instead of pinky.
I've also started getting back into the habit of bronzer/ contouring again wooo even though it's getting into winter haha.

take care & thanks for looking xx

Monday, April 23, 2012

How I fill in my eyebrows tutorial

Eyebrows are definitely one of the most important features on your face as it frames everything so if your eyebrows are untidy your makeup may not look as clean as what you would like. It is important to get them shaped by a professional especially the first time around, and to upkeep with tweezing the extra hairs that are coming through or with regular waxing.
You may also have sparse brows that look unfinished, and a way to add a more polished look is to fill them in. You can get your eyebrows tinted to your desired colour but that wont define the shape.

I'm not going to go into eyebrows shapes and all of that however I did want to share how I filled mine in. It is really quite simple and is just another step in the morning that I believe I cannot go without :) So here it is.

Products


 At the moment I'm using an eyeshadow and a small angled brush to fill mine in, the e/s I'm using is the dark brown colour in the Sleek Storm palette which is darker than my natural eyebrow colour but not darker than my hair. I find if I get a bit heavy handed it can be too much, though. If you are blonde you do not want to go 10 shades darker than your hair, also be careful of ashy or redness in some browns.
 I used to use the ELF eyebrow kit in medium & as you can see it was well used, I like it because it has a wax that you apply first & then set with the powder. I'll definitely buy it again one day.
Optional: This is an eyebrow duo for highlighting and brightening (I only use the nude side for under my brows) Sorry for it looking a bit manky haha. You may also need concealer to clean up the edges if you wish.

 Here is my naked brow. And eyes & face! yaay. My eyelashes are sad :( lol.
 Using the angled brush & shadow follow the top of the brow making small. short strokes. You don't want to change the shape here or it will look unnatural.
Do the same for the bottom, however it is ok to fill in the first half before the arch thicker and make sure it thins off towards the end of the brow.

 Fill in the leftover areas in the middle, making sure to still use short feathering motions to mimic the hairs. You do not want it to look too harsh. For the start of the eyebrow I just filled it in towards the center, if that makes sense, so it doesn't turn boxy looking.
 So that is how it is looking so far. Use an eyebrow brush if needed to take away the harshness. Stop here if you are happy with the shape & lines.

I applied concealer around the edges here (unblended so you can see) that I will blend out for neatness. If you do your foundation before your brows (which makes sense lol) leave concealer for the end.
With that blended out I applied the nude brow pencil under the arch- It's hard to see because of the concealer and not wearing and eye makeup, but you can leave it as it is or apply a shadow highlight on top to suit your eye makeup look.

Please let me know if this was helpful, confusing or not explained properly! I would love to hear your feedback.

Remember to never forget about your eyebrows :D

Saturday, April 21, 2012

Smoky Blues

Another double triple post, this time featuring smokey blues :) I'm going to keep the words short & sweet, lol. As you can tell by the title, the colours in these looks consist of blues... and they're smokey, haha.


~Look 1~

Using the beauty feature. My face looks rather pale what do you think??

 -Sugarpill Darling
- About Face Cosmetics in Into The Smoke in the Outer V & Outer crease
-Madd Mineral e/s in Cob Webs in crease
-BYS Black Gel liner

-Revlon CB L/S in Candy Pink
-Nyx Peach Blush
 ~Look 2~
These were before the lashes, diamante's & foundation.
 -Nyx Milk in crease, Nyx Black Bean on lid
-All blues from the 120 palette, teal in crease, dark blue on lid
-BYS Gel liner, Nyx Disco Queen Glitter Eyeliner
-Old eyelashes that have had their last use, lol.
& Diamante's for an extra touch :)


~Look 3~


 I was wearing blues for the daytime so I just went over the crease with golds but should have touched up the blue again.
-Teal from 120 palette
-UD naked: Smog in crease, Darkhorse in outer V, Half Baked over Smog
-BYS gel eyeliner, was going to go  a bit thicker but decided to leave it as it was.
I would have worn falsies but didn't feel like it this night haha.

-Australis Paparazzi Perfect Fdtn
-Unsure of blush but I think it may be bourjois..
-I think the lipstick is by BYS, Champagne Rain.

As always thank you for looking, I love wearing blues for some reason haha and I think its super versatile whether its worn as a pop of colour, as a gradient or smokey. How do you like to wear it? xx

Friday, April 20, 2012

China Glaze Magnetix + A couple more NOTW

Hey everyone sorry for the lack of posting once again. Here is just some recent nails from the past few weeks I though I've done more than this but maybe I haven't taken pics lol.


I used China Glaze Magnetix in Instant Chemistry. We are still playing around with these so the magnetic effect isn't as cool as the pictures in google lol but it takes getting used to. You buy the magnet separately which has 3 different patterns to choose from that you have to hold as close to the nail without touching it. But the overall effect is so cool!
Sorry for the messy cuticle edges & the splodge of gold on one! argh haha.

. This is the magnet & the patterns to choose from, taken from google. There are also quite a few different colours in this collection.

 I loove the way this green turned out! Its just from the chainstore sportsgirl & I added a blue glitter from BYS over the top. When I took this off I got it all over my fingers! haha
 This is just the same colourful nails as a few weeks back but was playing around with stamping plates which I think ties the look in together.
Sorry for the chipping, this is using a hot pink from Australis with a pink glitter over the top, it made me feel so girly I loved it! hehe.

Thanks for looking loves! Whats your fave nail combos? Or have you tried China Glaze Magnetix polish??
xx